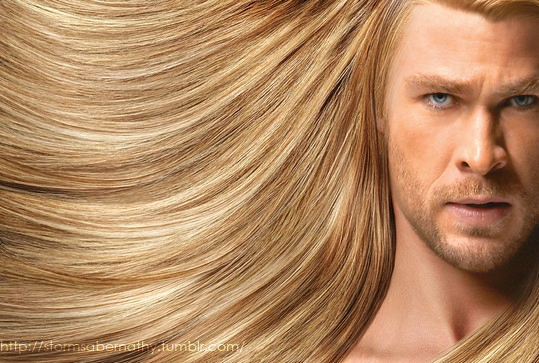
now that internet quizzes are big again, throwback to the time when 12yo me made a quiz that was like “this miraculous quiz can guess your hair color with ONE HUNDRED percent accuracy! just answer every question honestly and the quiz will know your hair color as if by ~magic~”
and then the actual quiz was just. one question. “what is your hair color”
honestly i still think that was pretty funny
Tags:
#overly literal interpretations #fun with loopholes #anything that makes me laugh this much deserves a reblog #hair
Buckle in, because this is going to be a LONG post. And I’m going to talk about BOG MUMMIES.
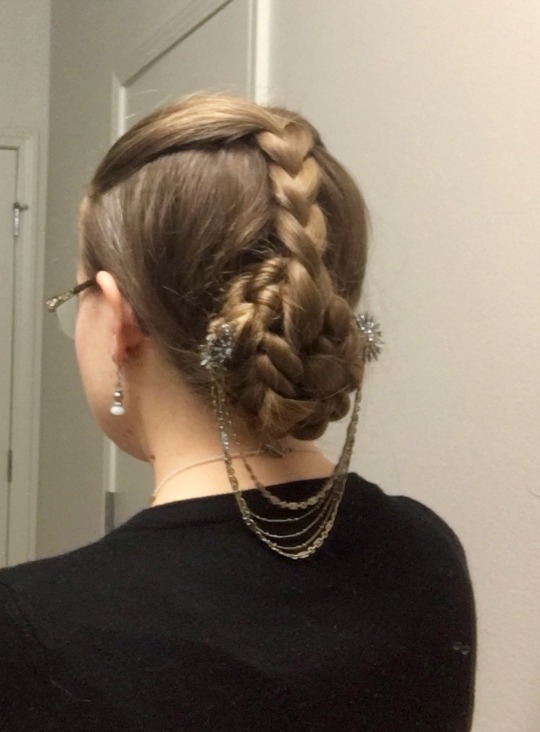
For reference, the hair in question:
This updo was actually what convinced me to grow my hair long in the first place (back in ye old 2008), and it has been strongly influential in my personal aesthetic ever since.
The story starts in 1938. Actually, it starts even earlier than that. In ~280 B.C., a woman died, and her body was placed in a bog, where it stayed until it was discovered in 1938, so well-preserved that the hair was still there.
This bog mummy is referred to as the Elling Woman. Here’s a bit about her.
The article talks a bit about her hair, but it’s kind of an unsatisfactory description. I found out about it when the article reached the Long Hair Community Forum in 2008, resulting in a 40-page (and counting!) thread wherein a bunch of long-haired women figured out how to recreate the hairstyle.
The ladies of LHC looked at the images of the hair, and were like: “Yep, that’s a rope braid.” “Here’s how you could do a 7-strand braid with 2-3-2 sections.” Etc. And basically, they tested out different versions, and came up with something that was cool-looking, comfortable, and practical.
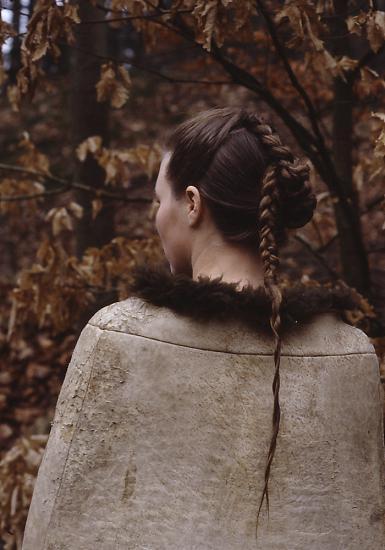
Here’s the ~official~ reconstruction on the Tollund Man website:
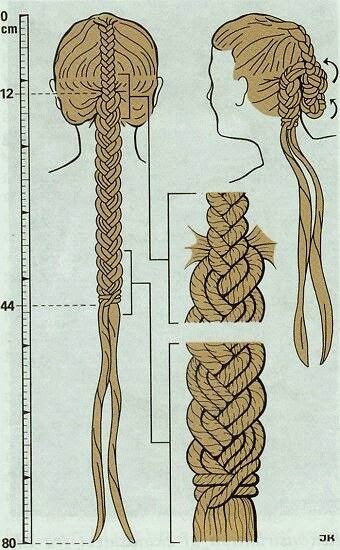
And here’s a (very confusing) diagram of how the style is supposedly constructed:
There are several different recreations of the style floating around the LHC and youtube and the wider internet. The style also looks and works differently with different types of hair. I had to grow mine out until I could make a waist-length braid before I could really successfully do it with my hair, but my hair is medium-thick and fairly fine, so YMMV. Some people on the LHC did it with much shorter and thicker hair.
The LHC thread about it is a fun read, but it’s a bit long and meandering, and there are several conflicting sets of instructions there, so I’ll just talk about the method that I use. If you want a video aid, what I do is basically this, except I do rope braids for the bottom 2/3s instead of English braids, and I finish it by wrapping the thick braid around the middle braid, like this (I’ve never actually tried that particular method for forming the big braid, but finishing up the bun is the same).
Here’s a written description:
Take the top 1/3 of your hair and braid it in a basic 3-strand braid (a.k.a. an English braid) down to a little past your neck. Tie it off so that it stays braided while you braid the rest of your hair.
Separate your remaining hair into two sections (each about 1/3 of your total hair), one on the left side, and one on the right.
Braid each section into a rope braid (a two-strand braid that’s made by twisting both sections in the same direction, then twisting them together in the opposite direction). Tie them off so that they stay braided. Also, I’ve found that it’s better to make the rope braids so that they’re coiled in opposite directions.
Take the two rope braids, and braid them with the top/middle section of your hair that you’d braided into an English braid. You’re basically making one big English braid. After I’ve started braiding it, I slip off the elastic tie that I’d used to hold the middle braid together temporarily.
Braid it as a 3-strand (that’s made up of two 2-strand rope braids, and one one-strand section that started as a 3-strand braid, so it’s sort of a 7-strand braid!) English braid all the way to the end of your hair. Take out the elastic ties around the two rope braids when you get to them.
Tie the whole thing off with a single elastic tie at the end.
To make the bun, you lift up the simple English braid (the one you made in step one), and you wrap the thick, complicated braid around it in a spiral.
Tuck the end in as best as you can, and then secure it with whatever you want. I’ve used everything from a hair stick, a hair comb, a few bobby pins, and even a single barrette before.
You’re done!
There wasn’t any evidence of any hair pins or anything like that to secure the hair found with the Elling Woman’s body. If your hair is very oiled and/or very unwashed, it might be able to hold itself in place without needing to be tied or secured. As it is, this style does work better if your hair has been oiled, or hasn’t been washed for several days.
This hairstyle is really cool for a lot of reasons, but it’s also extremely comfortable! The middle braid essentially holds the whole thing up, so you don’t experience any of the pulling you feel with some buns.
Basically, if I had to wear the same hairstyle for thousands of years, I’d definitely pick this one. It’s beautiful, versatile, comfortable, and has a really cool backstory.
Tags:
#hair #the more you know #neat #history #I am probably physically capable of doing this #but I don’t think I enjoy decorating myself enough for it to be worth the effort #(this was in fact my first thought upon seeing the picture) #(and reading the instructions did not change my mind) #that being said I’m glad this exists for people who are into that sort of thing
I like having long hair. I can see the ends vibrate with my pulse.
Wait, really?
*leans over arm of couch, watches waist-length hair dangle*
Huh. It does vibrate. Not sure whether it’s in time with my pulse.
My hair extends down to just below my shoulder blades. When I move it so that it cascades over my right shoulder, any tips that are not in contact with my body vibrate with my pulse. And (obviously) when I vibrate my head.
I think the ends were picking it up from blood flowing through my neck.
Depending on how you are leaning, I may be suprised. Is your hair in contact with your neck? Can you feel your pulse and see if the rates sync up?
Also. You have waist-length hair! I suddenly would like to braid your hair. And pet it and play with it.
[ Point of information: I am *human*. ]
The hair I was watching wasn’t in contact with my neck during the test. I had my hand pressed against my heart to check the pulse. Since I just washed my hair (after making the first post), and it’s now both lying flatter against my body and weighed down with water, I should probably wait before testing over-the-shoulder.
I’ve had hair going to slightly below my waist since before I even reached my adult height. There was a while in my pre- and early-teens where my hair length grew more or less proportionally to the rest of me, and it stabilised around the same time. (This is one of my favourite things about having long hair. The hair length of most short-haired people is always changing, and every so often they have to go out of their way to prevent it from going too far past their desired length. Mine just stays as it is, and has for over a decade. I like that stability.)
I am not in the San Francisco Gravitational Field (I’m in Ontario, and not the one in California), but if we’re ever together, there can probably be hair-playing.
(Mom–who has just-above-shoulder-length hair, and is the reason I thought to put a “most” qualifier on shorter-haired people not having stable hair length–asks to braid/play with my hair sometimes. I’m not sure what the big deal is, but I might just be spoiled by having access to long hair all the time.)
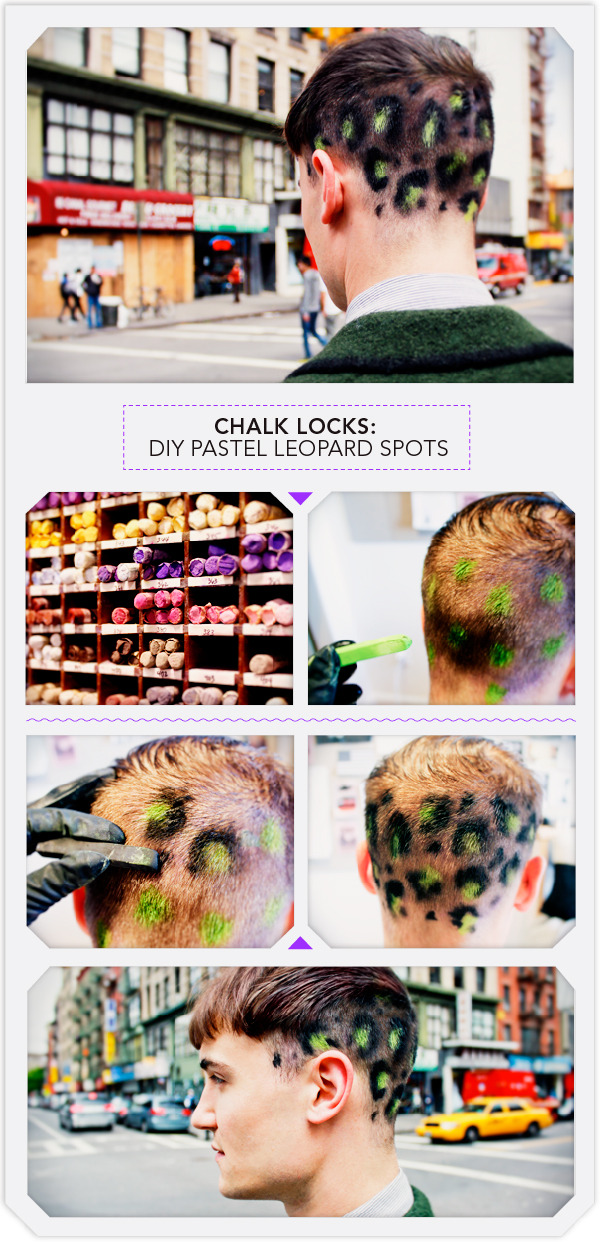
“Hair chalking” is the latest trend in temporary hair color, and after soaking up our share of YouTube tutorials on how to fake a dip-dye with a box of pastels, you can bet we were scrounging through our leftover art class supplies ready to put a package to use. Using chalk pastels on dampened hair will result in a vivid look that easily rinses away in the shower, thanks to the powdery formula. Think of it as colored hair powder in stick form. Though pastels are prime for streaking long hair, we discovered that not only are they more vibrant on shorter locks, they’re also a lot less messy.
This wild leopard look is easy to achieve and will leave everyone wondering who does your hair! Do it on yourself, on a friend, mix it up with a combination of colors, or think up your own pattern! Just make sure you shower before hitting the sheets, or you’ll be faced with a mess the next morning. Let’s get chalking!
You’ll Need:
1 box of chalk pastels from an art supply store
Rubber Gloves
A glass of water
A towel
STEP 1
Wet hair with water and wrap a towel around your neck to protect your clothing. Select a bright-colored pastel for the leopard spots (we chose green).
STEP 2
Wearing your gloves, dip your finger into a glass of water and wet a desired starting point on your head. The wetter the hair, the brighter the color will be. With your colored pastel, draw a spot no more than half an inch wide on your locks. Repeat, drawing another spot of a slightly different size about one or two inches away from the first. Continue until your desired area is covered entirely in spots. Don’t worry about making perfect circles, either—spots look better slightly oblong.
STEP 3
Wet your finger and use it to dampen the hair around the edge of a green spot. Then, take your black pastel and draw a U-shape over the top of the spot. Repeat over each green spot, altering not only the size of the U-shape, but the direction it faces as well.
STEP 4
Finish the design by drawing random small black spots in open spaces.
STEP 5
Blow-dry your hair if needed, and wipe your neck or ears free of any loose pigment. Mist your head lightly with hairspray to ensure it lasts the day. To remove your design, simply wash away with shampoo.
Rock your new do’ all day and give them something to chalk about!